Log In.
From the quick menu (left) choose Other to be taken to the OTHER FRONT DESK TASKS screen.
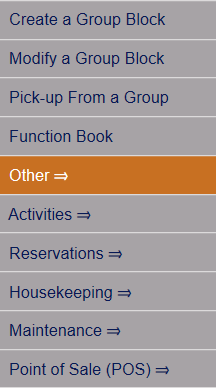
The OTHER FRONT DESK TASKS menu has 4 sections, Other List 1, Documents, Other List 2 and Web.

Any Outward Facing documents for your Property can be fully customized by you using your Skyware Systems software. This means any documents you produce and release to your guests may be branded the same way, contain any image you wish, and hold any information you would like, be they receipts, stay summaries, email newsletters or something else. It is completely up to you!
This Help Topic will lead you through the steps required to reach the Editor you will use for this process, and the basic guidelines for producing or editing any such document. Skyware Systems provides you with several default documents at install; these are generic versions that can then be customized by you, or you can create your own from scratch.
To customize a document using the Document Editor, you will need the OTHER FRONT DESK TASKS menu, where you will reach the Document Editor by clicking on the relevant Document type, in the Documents section.
Log In.
From the quick menu (left) choose Other to be taken to the OTHER FRONT DESK TASKS screen.
The OTHER FRONT DESK TASKS menu has 4 sections, Other List 1, Documents, Other List 2 and Web.
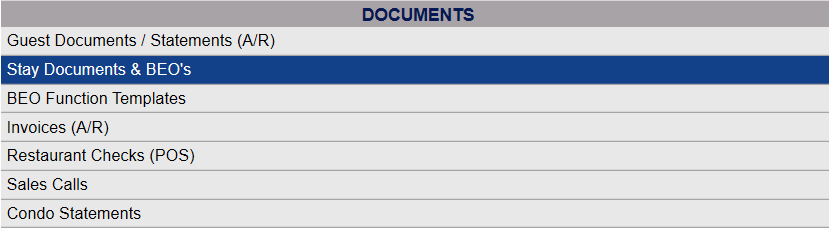
Select the document type you wish to customize from the list in the Documents section. For example, you wish to customize your email confirmation document. This is in the Stay Documents and BEO's section.
When you select Stay Documents and BEO's the Stay Documents and BEO's Maintenance page will open. It should look similar to this:
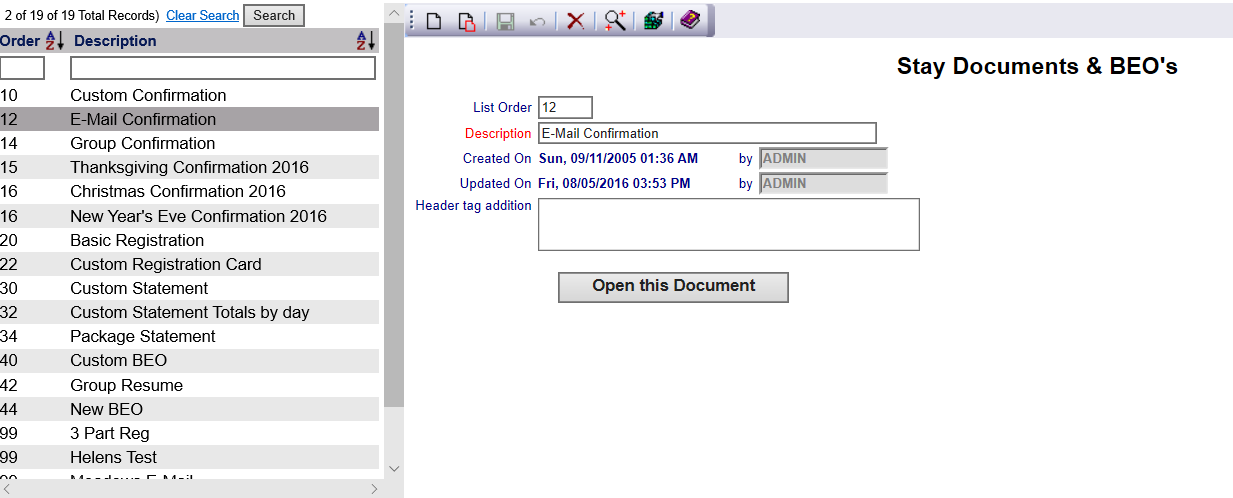
With a listing of already configured Stay Documents and BEO's on the left and a set of configuration tabs on the right.
If you wish to customize a document that is already present in your system, simply select it from the list on the left by clicking on it and the details of the entry will be displayed on the right, and then you can Edit the current selection. Change the field information as desired.
If you wish to add a new document to your system, you will use the buttons in the toolbar above the tabs on the right hand side.

You can either:
OR:
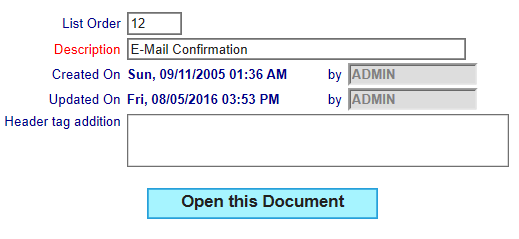
The right side contains the fields you need to complete in order to add or edit a document on your property.
Note: These fields are the same for any type of document you wish to customize, from any of the selections in the Documents sub-section of the OTHER FRONT DESK TASKS menu.
List Order: This determines in what order the document appears listed in the interface.
Enter a number into the List Order field.
This field is optional. If no number is added, the documents will be sorted alphabetically.
Description: This is the description or name of the document.
This field is required. You should also be sure to name the document something easily recognizable by anyone who may need to use it, be that print it or email it.
Created On: This is when the document was created, with date and time, and the by: field displays the user who created it (from the Log in data).
Updated on: This is when the document was last edited, with date and time, and the by: field displays the user who updated it (from the log in data).
These fields are automatically completed and not alterable from this screen.
Header tag addition:This field is customizable by Skyware Systems at your request.
When you are finished adding or editing a document, click the Save button to save the changes.
(To view any changes made, click the Activity log button in the local tool bar).
Open this Document: This button, when clicked, will take you to the Document Editor, with the currently configured document you have open for you.
The Document Editor displays either a blank document if new, or the details of the document so far configured.

As can be seen in the example, you have a lot of customizable options available. The custom tool bars contain multiple editing options, including the usual editing set such as bold, underline, italics. You have multiple ways of inputting data.
Let us break the page down into smaller pieces:

In this top section, you have a few important areas:
The orange "Cancel" button will return you to the previous screen, in case you have opened a document you did not intend.
The orange "Save Document" button will save the document you are working on. It is recommended that you save fairly often, as the Document Editor does NOT have an automatic save function. HOWEVER, whenever you click this button, it will save the document AND return you to the Document list page. If you wish to continue editing the document further, simply click on the "Open this Document" button there once more to return to the Editor.
The Description field is the same as on the list page, and is fully editable. You can call your document anything you wish. Remember though, any changes made on the Editor page will when saved be reflected on in the Document List page, and you should use a name that others will recognize easily.
Select Token to Insert...: This is a drop-down menu of the tokens available for inserting into your document. An inserted token will display in the document as a gray box with the token name in parentheses. Those labeled with grid will drop a grid in with various option, for example a grid may contain room type, room rate, number of nights, total balance to pay.
This is a very large list to select from, and you can scroll to the one you want. You also have the option of selecting "SELECT FROM BASIC TOKENS" in the drop-down menu, which will open another window that shows the list of options specifically configured for your property. Again, scroll down to the desired token and click it to enter it into the document (the token will be inserted where your cursor is in the document field).
Alternatively, clicking the orange "Go" button will also open this separate window of basic tokens.
Note: The lists of Tokens available are very large, and may be somewhat difficult to navigate. Using the find function can be useful for this - simply press the ctrl key + f together to open the search field box, where you can type in what you want to find.

The next section is the Tool bar ribbon, which is a bar containing buttons and options that you use to carry out commands. This contains several recognizable options, including such tools as Bold, Italics and Underline, or Font size and type. Each individual icon in the toolbar can be hovered over using the mouse for its description. Clicking on the icon will allow you to use it. This is very similar to other such tool bars that are found in document creating software such as word. You should explore the toolbar ribbon when customizing your own documents.
Note: If you need to undo an action, there is a delete button in the tool bar, or ctrl+z can be used to undo an action you have performed.
You can also click the back button in the browser, but this will take you back to the (previous page) document list page where you will have to click the Open this Document button to return to the Document Editor page, so this is not recommended.
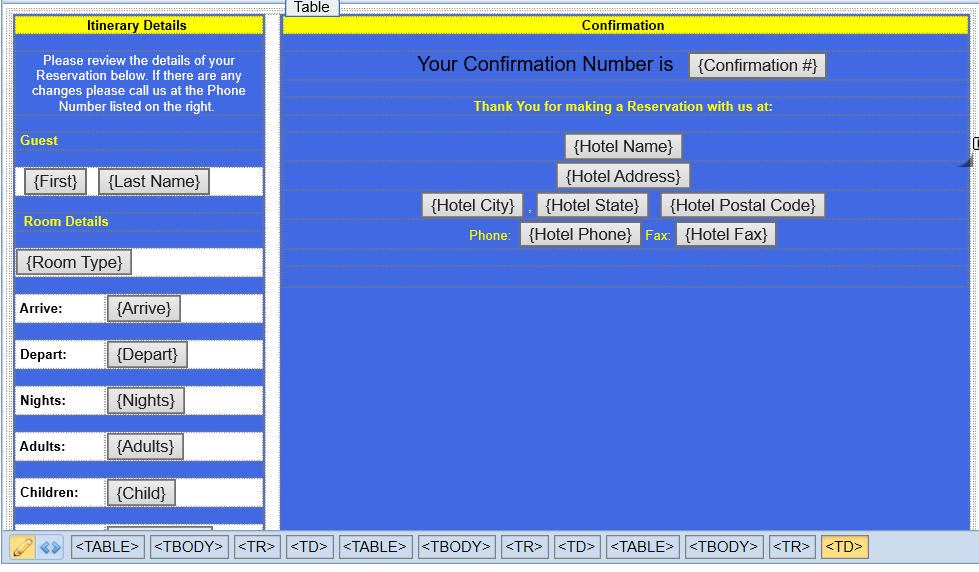
As can be seen in the example here, the document has been made using tables inserted as the basic building blocks. Certain cells have been block colored yellow, others blue and some left white. Information that remains the same for everyone is directly typed into the cell, information which is variable is inserted using the appropriate token.
You can use the toolbar ribbon above, type directly into the cells, or you can alter the properties of a cell (<TD>), a row (<TR>) or even the whole table (<TABLE>) at once by clicking on the html building blocks at the bottom, which will open the Properties dialog box and allow you to pick and change settings in either the COMMON (such as color, height, width) or STYLES tab such as font size, borders).
Hovering over the relevant building block in the bottom will highlight the area affected in the table itself, allowing you to choose which block to click to affect the properties of the cell/row/body/table.
If cell contents are all the same, it is recommended you modify the cell using the properties dialog box rather than the buttons in the tool bar.
Any new document you create will be blank.

The basic building block of any document should be tables. Keep your documents in the simplest form possible.
You can insert a table using the icon from the toolbar ribbon, and you can choose how many rows and columns you wish to be in the table by highlighting the pattern (by pressing shift + →) then clicking to insert the table into the document body. You can merge cells, add cells or otherwise alter the layout of the table once it is inserted by right clicking on a cell, scrolling down to the table choice and choosing what you want to do from the available list.
You can type in what you want to any cell.
Note: Tables are generated with a single space already in each cell to allow them to correctly display on the page. You may need to delete this when inputting information.
You can also insert another table within a single cell of the first table to add row/colums to a section of the table. If you do this, you will need to remember to go to the inserted table property dialog box to change it rather than the other table
You can insert a token into any cell, or multiple tokens. The chosen token will insert where the cursor is in the document. You can change the properties of a token by right clicking on the token insert or by clicking the html building block for it in the bottom bar (<INPUT>). Note: Until you have clicked on the token the first time to edit it, the <INPUT> will not be displayed.
You have a lot of options to alter the way your tables or cells are displayed - you can add borders around tables, dotted lines around certain cell, have cells filled with varying colors or be different sizes. You should explore the Toolbar ribbon and the Properties dialog box tabs and experiment to see what suits you and your property best.
You should however refrain from setting the HEIGHT or WIDTH of cells or tables, as not setting these options as fixed numbers will allow your document to alter to fit the device on which it is displayed (for example a tablet or a smart phone), and instead in the STYLES tab of the Properties dialog box for your table you should go to the BLOCK option, and under White-Space choose "nowrap". This will allow your document to be displayed on any browser as is intended and any device as in the Document Editor.
Any images that you include in your documents NEED to have a URL so that when they are sent out they do not display as a broken link. This means any image that you wish to include UNLESS it already has a URL link or you can generate your own, should be sent to Skyware Systems for processing. It will be returned to you as the URL.
Note: The ideal image size is small - kb rather than mb - for ease of downloading when your customers receive your document.
To add an image to a cell, click on the Insert Image icon in the toolbar ribbon.
Note: If you have not already removed the single space in the cell you should do so now.

This will insert a small place holder image to demonstrate where your image will appear, and open a wizard for you to paste the URL into. Other information can be added in the wizard (for example a name, or a tool tip for hovering) but this is optional. Once you are happy, click OK and the image will appear in the location your place holder was in.
If the image is not the desired size in the cell, either right click on the image to open the properties dialog, click on the html tag (<IMG>) or more simply use your cursor to hold the corner of the image and drag it to the desired size.
The simplest difference between a Header and Footer is that a Header forms the top border of the page, while the Footer is the lower border. These have their own identity, and sit at either the top most (Header) portion of the page, separated from the rest of the body, or the sits at the bottom (Footer) portion of the page.
Headers would usually include your Property name and location, and probably an image of your property. You should also include your contact details, and your web address if you have one.
Footers usually include any legal information, such as your cancellation policy, requirements for receiving a discount (such as presenting a AARP card) , or what to do if your reservation information is incorrect, with specific contact details if they differ to the general property contacts. You can also include a signature area.
Your Headers and Footers should contain between them everything that you wish to appear on all of your documents, and enable you to simply and swiftly brand your documents. It is recommended that you create a Template document (with a 3 row, 1 column table) containing a Header in the first cell, a single empty cell for the body of the document and a Footer in the last cell. Then when generating any further documents, you simply insert a table into the single cell of the body region, and place your actual document specific content into that table. This saves you from having to input the same information repeatedly for all your different documents.
Date Updated September 05, 2024